Cloud computing is the way of the future, right? Well, yes, but it’s also expensive. $55/month expensive. That adds up year-after-year, so I decided to purchase a server I could get keep running here at the house to bring all my websites back home (literally) … being careful to stay within the confines of our fiber internet provider terms of service. Good-bye Charter and your restrictive “can’t host anything” ToS.
This presents a number of challenges since I host a couple relatively popular web services with a few thousand users on each. While we rarely lose power at the house, and so far our fiber internet seems to be quite reliable, I am a bit nervous about extended down time on those services.
So the plan is to provide as much uptime as possible on those web services and document the strategy for keeping everything up and running along with all the contingency plans in place for extended down time.
Repurposing a Ghost Canyon Gaming NUC
I started digging around at potential cheap server options for the house. I eventually stumbled upon this Ghost Canyon gaming rig when I set the filters on Amazon for 9th gen, Intel core i7 systems with 64GB of RAM and more than 2TB of storage. This one has exactly 64GB RAM and two 2TB NVMe.2 drives for a total of 4TB storage on a single system. The price ($1999) was bit more than I was hoping to pay, but it would fit exactly my needs, and would save me who knows how many hours of building a system. As you will soon find out if you keep reading, I did in fact have to take apart the system to send back one of the SSDs. I’ve already reassembled it once now with just a single SSD and will need to take it apart and reassemble it again when the replacement SSD arrives in a few days in two weeks. Ugggh. I could have saved some money and got an even better processor if I had built it myself, and these Intel NUC extreme kits make it fairly straightforward. Live and learn. Digging farther, my system was a pretty good value system considering other ones I found with better processors would have ended up closer to $3000!


This particular i7 (9750H) has six CPU cores with hyperthreading enabled yielding a total of 12 logical processors. Each core runs at a base speed of 2.6GHz with Turbo Boost up to 4.50 GHz. But perhaps most importantly for my purposes, the processor is rated at only 45W CPU (TDP – Thermal Design Power – average power when all cores operating at base frequency processing an Intel-defined high-complexity workload). This means that you don’t need any large fans at all to keep the system running smoothly AND quietly. This is important because I plan to keep it installed right next to my main home work computer and will be sitting next to it for hours a day.
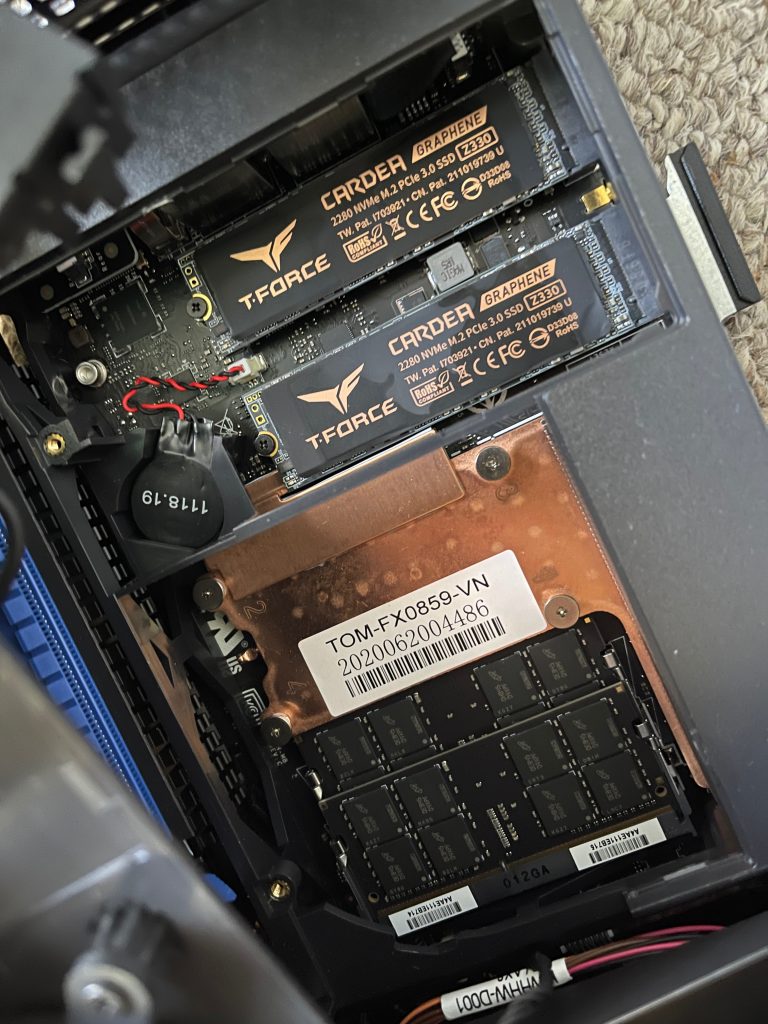
Also, the i7 is packaged as part of the (new?) Intel NUC extreme kits. These kits include the case, power supply, CPU Compute Element, and what I will call the “mainboard” (i.e., tiny motherboard or daughterboard) – but you need to install the SSDs, RAM, and potential PCI-E expansion cards (room for two). The CPU Compute Element is large slot style CPU card that has not only the CPU on it, but also two internal slots for NVMe SSDs, and two DIMMS for RAM, all on board the CPU slot card. One of the lessons I (try to) teach in my hardware class is that, distances matter. The longer the physical distance is between parts, the slower a system will be. This is the next evolution of the traditional motherboard which fits between phone “main board SoC – system on a chip” and traditional large motherboards. This is an SoSC (system on a slot card), a new term I just invented which may already exist, but I’d like to register and trademark it if it doesn’t. (12/14/2021 – 5:41AM) – I think the current term is “Compute Element” … how boring is that!
The system arrived late in the afternoon, so after I got home from work I unboxed it, plugged it in, and booted it up into the pre-installed Windows 10 Professional (which I probably paid at least $100 for as part of the bundle). I had no plans at all to run Windows 10 on this system, but I thought since it was already installed, I might as well boot it up to make sure all of the hardware was working correctly. Everything seemed fine, but I wish I had done some more thorough testing from within Windows, which potentially could have saved me a lot of issues if I had been able to detect that one of the SSDs was faulty. But before I get into all those issues, let me run through the contingency plans I’ve been mulling to handle extended downtime, including Power and Internet outages.
Power
I made a first step in handling power this morning (December 15th-ish, it’s now February 15th) when storms caused our power to flicker. This reminded me that I needed to reconfigure what is connected to my APC back-ups 550 power supply, which hopefully will give me about 10-15 minutes of power outage protection. I’ve plugged in the new server along with our fiber router so that as long as our service outside the house stays online, I should be good for 10-15 minutes.
A very popular and environmentally unfriendly alternative is a whole-house outdoor generator. It is quite loud when you bike through the more expensive neighborhoods near mine (but thankfully not mine, yet) when the power is out. I am definitely not going to go down that route because of the cost and environmental impact.
But what will I do if the power is out for longer than 10-15 minutes?
AWS Replication
The general strategy for longer power outages could be to have AWS services configured and ready to go up at a moment’s notice. Ideally, upon receiving a downtime notification (or noting that the power has gone out at the house), I can use an AWS phone app (or create one if it doesn’t exist) to immediately launch all the services and bring up a down-time page. The ideal scenario, also, could be to provide a limited “read-only” version of the web services that will allow users to view a read-only version of the latest db replica.
Looking at the costs, though, given that my databases are now approaching 50GB in size, my best option may be to make sure that my websites which don’t have a lot of data are simply replicated on an EC2 system I could bring up at a moment’s notice and fairly quickly pull updates from some sort of backup service.
For the two services with huge databases, I think my only cheap option is to make sure that the domain names still resolve to some sort of placeholder page with a message indicating something about unexpected down time from power or Internet outage. Because it doesn’t make sense to bring the server home and then still be paying $50/month for all the necessary services to keep DB replicas in place to swap to.
Also, the marketing terminology right now (at least at AWS) is all about “db clusters”. As far as I can tell this means having multiple copies of the SAME database replicated on several different servers scattered in different availability zones. That’s not what I want at all. How does one just create multiple databases? It looks like using the AWS RDS model I would create multiple db instances … but if I’m reading everything right, that could be hugely expensive.
Ok, scratch that, I found a “hit” using this search: “aws create multiple databases”. The first hit was this Amazon documentation page, which indicates that a single AWS RDS DB instance can host up to 40 different mysql databases…that is PERFECT! Ok, that isn’t going to work, even on the tiniest plan, you are looking at $40/month for full-time usage.
But what about only powering up the system once a week and replicating the changes since the last time the system was powered on? For 100GB of database storage with 1 hour / week usage, the cost looks to be about $12/month, which includes a daily backup of the database! This could really be perfect, but I haven’t had the time to set it up yet (3 months later).
In addition to the AWS replicas of the database with storage, I’d like to figure out a way to do a local daily back-up of the server to an external 12TB MyBookDuo drive. Ideally, this would be some sort of “diff” style backup of both the files on the server as well as the current database contents (ideally without having to do some sort of script based mysqldump each time – the dump itself is taking several minutes now and then copying to the external harddrive would be another few minutes).
This has really opened my eyes to the challenges of modern cloud computing infrastructures, server backups, db backups, and replication. I hope to eventually turn each of those phrases in the previous sentence into a separate blog post. But let’s continue on with the task at hand – setting up the new server which arrived nearly a week ago now and which I have been working on ever since…
First step is setting up the server … ubuntu 20 … spec’d to make it possible to import and run both a tile server and a nominatim geocoding server for the entire planet.
“EVERYTHING WENT PERFECTLY”, said nobody
Of course there were a million issues getting everything setup as documented below. I would like to point out that many of those issues were related to a faulty SDD drive, but still, this is a long list:
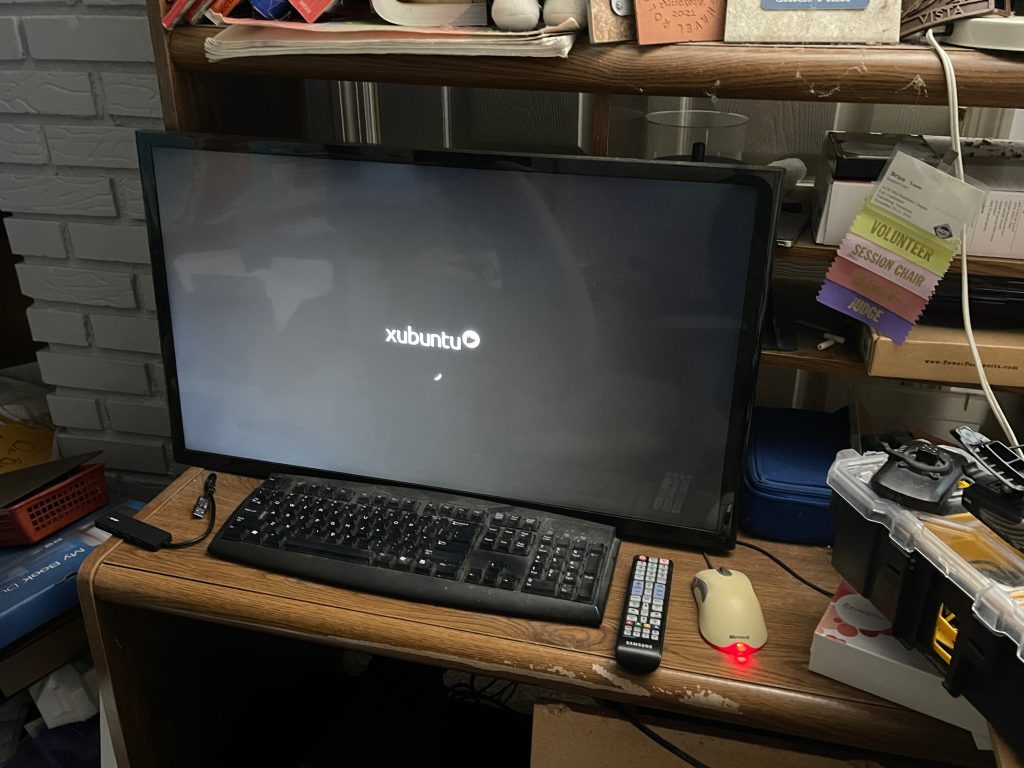
- No CD drive and no external HDD I could easily use to boot the installation process. Largest USB stick I had was a 2GB one, which was enough room to fit Ubuntu Server (but not Ubuntu Desktop). I wanted to install Ubuntu Desktop because I knew I would occasionally want to boot up into X to manage the system, since it would literally be sitting right there next to me. As I would find out several install attempts later, Xubuntu does indeed fit onto the 2GB USB stick and that is what I eventually used … but first …
- First install of ubuntu server wouldn’t let me create RAID 1 without using entire disk … I think I know how to do that now … one of the times I tried by designating the flash drive itself I was using as the installation location for /boot/efi and RAID 1 drive for / … this failed … and possibly corrupted the USB disk b/c after that I kept getting checksum errors when I later decided to install ubuntu server 21.04 since it is out already.
- Eventually, after that install failed a couple times, I realized I could just use Xubuntu installer which still fit under 2GB (my largest USB disk) but every time I went to flash the USB disk, I was getting a “validation failed” message afterwards … and then even though the system would boot up to the installer, it would give me errors during the integrity check phase.
- So I biked to Walgreens after mountain bike practice and bought a 32GB flash drive on sale for $16 and was able to successfully flash Xubuntu installer. For reference, my first USB stick cost $100 and only had 512MB of storage, which was huge at the time back in 1999.
- I should note that even though there were issues during install, I was able to install Xubuntu successfully on the first try and proceeded to work on getting the planet.osm import process started (documented elsewhere). Picking up on 5th attempt at importing the planet now and some of my notes are below and some are elsewhere. I’m hoping to take some of the notes below and combine with the full “OSM import” post and trim this whole section down to a bare minimum summary for this post … but for now, I’m going to pick it up here that on the 5th import after 8 hours, it has made it through processing all the nodes at slightly lower speed (I turned off the memory cache since I may have been running out of memory) and about 1/5th of the way through processing the ways. But the osm2pgsql process has still grown to 70.9G in virtual size with the full 2G swap being used. This interesting difference between Xubuntu and Ubuntu server … Ubuntu server used an 8G swap file … but Xubuntu only setup a 2G swap file … still going strong in the morning, but that virt memory kept creeping up so I went ahead and followed these instructions to add additional swap space: https://www.digitalocean.com/community/tutorials/how-to-add-swap-space-on-ubuntu-20-04
Interestingly, the commands were all instantaneous – so my fear about this causing excessive load on the SSD while the import was running was unfounded. - The OSM import failed again for the 5th time … this time it failed a little bit earlier with some more detailed info (see homebuntu.sav screenshots, log file, and txt doc), but still an INPUT/OUTPUT error. Based on my digging around online, it looks like the only potential cause of this is SSD related. Ran smartctl check and there is almost 30,000 errors, so going to RMA the SSD and exchange for new one.
- While I’m waiting (and potentially permanently), I’m going to try again installing the tile server on just the single SSD. One change I made was based on seeing someone seeing a crash b/c they were running out of shared memory so I increased that to 20GB and cut down “effective_cache_size” back to just 16GB. I probably should have done an IDENTICAL install attempt to verify 100% for sure that the problem was with the SSD and not with that one param.
- LOL – forgot to take out the SSD that I am sending back before starting the import … thankfully I was only about an hour into the import … so aborted it, dissected the NUC and it is super, duper cool. Got a few pics of the innards of an intel i7 9th generation CPU card … the NVmE slots and RAM slots are INSIDE the CPU card … you literally take the small fan and heat sink off the outside of the CPU card itself and lo and behold there are the NVMe’s … 50/50 chance of getting the right one and after looking for some sort of identifying label, I picked the one closest to the CPU inside the card (since in Linux it was nvme0 failing and nvme1 was working … so presumably they started counting from closer to the CPU). In any case, I put everything back together and it booted back up into the new install of Linux
- Try #7 … only change this time is that I added 32GB of swap to Linux … little bit worried about disk space since I only have 2TB available … definitely can’t install both the tile server and nominatim on one 2TB ssd since they need different databases … I will have to wait until I get the new SSD before installing nominatim … let’s just hope the tile server works on try #7 … with no errors!
- UPDATE: import ran overnight and made it past Ways and looks like it as at least 1/3rd of the way through Relations (previous imports errored out right around the beginning of the ways imports). Also, as discovered previously, but made clear this morning – SSDs are most definitely not silent. I can hear little ticking noises whenever the SSD is active. It went from a steady ticking during Nodes which you could barely hear due to high CPU load, to a louder steady ticking during Ways (b/c CPU load dropped), to a very sporadic but quite noticeable ticking during Relations b/c CPU is hovering around 20% and there is zero fan noise. I wonder though if the sporadic ticking is a sign that the I/O ops being performed during the Relation import (I think it has to do a lot of look ups of previously imported data) really stresses some part of the SSD that was broken. Or if it’s just b/c it happened to make it to the “bad block” of the SSD right about that time during the import process. Either way, it appears that it is going to at least make it to the indexing phase!
- Working on final exam, and heard CPU kick up all of a sudden. Relation import was delayed for a while and not doing anything but it resumed after about 10 seconds. 20.3G/62.5G RAM available plus 4.13G/34.0G swap available at the time. Perhaps it was a particularly LARGE relation which required looking up a lot of things … shortly before hitting 4,000,000 relations imported … or perhaps some unknown process kicked up on the system (Xubuntu software updater checking for updates? probably should have disabled that, but I didn’t see anything jump to the top of htop to replace postgres or osm2pgsql – sorted by cpu usage). Also, CPU went back down to normal after the 10 second delay.
- Was just trying to figure out when this import would finish the next step (i.e., how many relations are left) and I discovered this page: https://www.openstreetmap.org/stats/data_stats.html – Woohoo! Kind of exciting, but I looked up and saw that I only had about 30,000 (out of 9.5M relations left) so I watched it for about 10 seconds import those last ones … then immediately the CPU load shot up to almost 12 (I think that’s max) memory pressure still doesn’t seem too bad … Load has dropped all the way down to 4.4 (fans are at max … so I’m wondering if there is some heat throttling going on … I do not have the case on to help with air-flow)
- Stats for the XML import (pre-indexing):
7,358,355,440 nodes (yes, that’s 7.36 trillion) imported in 15,152 seconds (~4hr12min)
820,819,390 ways (820M) imported in 30,322s (~8hr25min – mostly overnight)
9,466,714 relations (9.5M) imported in 21,805s (~6hr3min – entirely while I was sitting beside the computer working on finals and advent of code) - Indexing stats:
planet_osm_roads – 1339s
planet_osm_point – 408s
planet_osm_line – 8493s
planet_osm_polygon – 22173s (while I went for a bike ride) - Woohoo, it finished with no errors! Grand total time – 90,399s (i.e., ~25hr6min)
- Installing mod_tile and renderd turned out to be easy to do but super hard to debug … instructions missing very important step:
sudo -u postgres psql -d gis -f /home/osm/openstreetmap-carto/indexes.sql
Without that, the massive database was essentially unindexed (or at least not using the indices required by the tile rendered) … so because of that, the tiles were not being generated in any reasonable amount of time so I thought it wasn’t even working. - Eventually got the map to work and started a “pre-rendering” of all the Zoom levels through 12. It’s supposed to be able to render the tile dynamically as you zoom in on the map, but those were timing out … also there’s a weird ioctl message in the journal which makes me think that it’s a conflict with the pre-rendering that is still going on … once it finishes (maybe late tonight) I will try to track down and debug that error (probably a permissions error from what I have read so far):
“Failed to send render cmd on fd 20/21/etc… send error: Inappropriate ioctl for device” - Pre-rendering is really CPU intensive … I may end up stopping this early … this is starting to be a lot of wear and tear on my little system! I keep looking over and seeing all 12 threads in htop maxed at 100% and mem pressure pretty high too using 40-50GB ram. 44 “compute hours” later which looks like is about 7h real time (it is currently at 550% cpu which counts 5.5x wall-clock time) and it is still going! Mem is currently at 55.7G/62.5G physical and 25.2G/34.0G swap (I’m glad I didn’t shrink the swap after completing the import!)
- Finished! All tiles rendered through Zoom 12 … plus I have zoomed in beyond that all over the place and with “ok” performance it is able to render the non-pre-rendered tiles, too! The render_list command says 60,879.27 seconds (roughly 17 hours) and that sounds about right. Interestingly, the individual zoom outputs appear to be reporting CPU time with Zoom 12 taking 173,179 seconds (or almost exactly 2 days) even though script was only running since yesterday afternoon.
- Still had issues after rebooting … permissions error. Eventually I managed chown osm._renderd and that seemed to be the permissions trick. Have rebooted a couple times now and rendering seems to be working for the most part without the weird ioctl errors. Interestingly, I’m getting this error occasionally: SVG PARSING ERROR: “SVG support error: <enable-background> attribute is not supported” … also I’ve gone one “Failed to send render cmd error on fd 6” accompanieds by a a “send error: inappropriate ioctl for device”. But that is just one when I was getting 10s-100s of those while trying to render before. Also the fd 6 number is much lower than previous errors 12, 20, 21 etc… So I’m thinking this was completely different error.
- Note about resolving the last issue (permissions), I did a million things and didn’t document them properly so the “chown” fix may have been the corrective action all by itself, or it may have needed the other things I tried … including chmod 777 for the entire /var/cache/tile directory structure. I eventually chmod it back to 644 for that entire directory structure … some programs do check file permissions and if you give it too much permission, it will error out. I don’t think this is the case here, but I was trying everything to get it to work.
Nominatim import
- 1/1 4pm – Upon returning from vacation, I played around with the tileserver (including debugging the permissions errors referenced earlier) and everything is going quite well now.
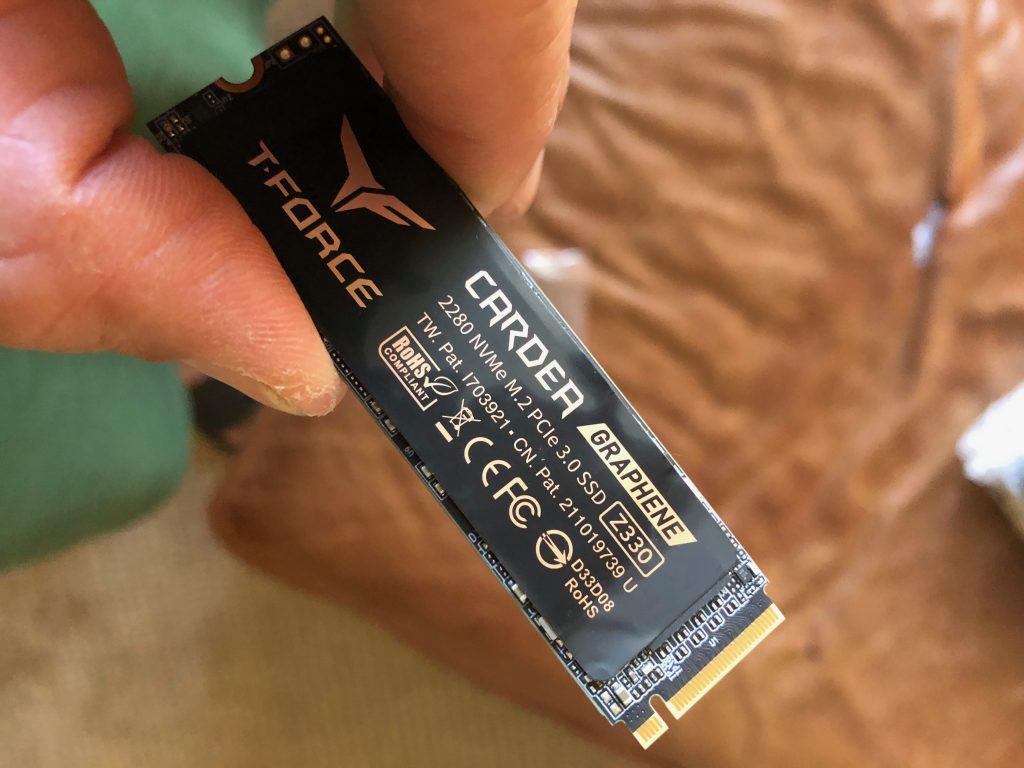
- My replacement SSD arrived. It looked brand new in new box [pic]
- I took the CPU compute card apart again and inserted the SSD into the correct NVMe slot. I was concerned that this would cause Linux to not even boot b/c I noticed that when I reinstalled Linux with just the one SSD, it detected it as nvme0 … which is the mapping given to the SSD that I took out. The working SSD was in nvme1 (the slot farther from the cpu). THANKFULLY, the /etc/fstab process identifies drives by UUID now instead of slot … this meant that even though the working SSD did indeed get renamed back to nvme1, it was still found b/c the fstab entry only specified the UUID.
- To mount the new SSD (which was back into nvme0), I first installed gparted, created the new partition table using gpt (NOT msdos, b/c no windows at all ever going to live on this system), which is what enables specifying the partition by UUID … it also lets you name the partition and you can use that instead of the UUID in your fstab:
PARTLABEL=nominatim /srv/nominatim ext4 defaults,uid=1001,gid=10010 2The uid and gid are for the nominatim user account created at the beginning of the nominatim installation process… 1/10 – this is ONLY if you are using FAT32 partition table …. native Linux partitions such as extr4 should NOT have the uid and gid specified. - Since I already have the tile server installed on the the other SSD which now only has 1.25TB available, I was a little worried about trying to install nominatim on that same SSD. The issue is that postgres is currently storing all its data on the first SSD … introducing postgres TABLESPACES … this allows you to specify the directory where postgres should store the data when you issue a command that references a TABLESPACE. Thankfully, nominatim has options that let you set the TABLESPACES to use in the .env file. I manually copied the env.defaults file as a .env file in my project directory and set the flatnode file and the tablespaces. I’m currently running the import and it is humming along and definitely using the new disk … BUT … I think it’s just doing the flatnode file right now. Once it starts to really import and index the data, I wonder if it will pick up those options correctly and continue to store the data in the specified tablespaces.
Before using those settings, though, you have to su to the postgres user account, create the directories (and leave them empty), then login to psql and create the tablespaces:postgres@homebuntu:~$ mkdir /srv/nominatim/data/dbs
postgres@homebuntu:~$ mkdir /srv/nominatim/data/indexes
postgres@homebuntu:~$ psql
CREATE TABLESPACE dbspace LOCATION '/srv/nominatim/data/dbs';
CREATE TABLESPACE indexspace LOCATION '/srv/nominatim/data/indexes';
quit;
And here is the relevant settings in the .env file:NOMINATIM_FLATNODE_FILE="/srv/nominatim/data/flatnode.file"etc… (there are several more SEARCH_DATA and SEARCH_INDEX options … I set each of them to dbspace and indexspace, respectively)
NOMINATIM_TABLESPACE_SEARCH_DATA=dbspace
NOMINATIM_TALBESPACE_SEARCH_INDEX=indexspace - And the results … made it past first phase – osm2pgsql took 28377s (7h 52m 57s) … 7358355440 nodes in 15982s (4h 26m 22s) – 460k/s, Process 820819390 ways in 9122s (2h 32m 2s) – 90k/s, Processed 9466714 relations in 3271s (54m 31s) – 3k/s … now it is “loading data into tables” … so I think that means it is reading from the flatnode file and pulling it into the actual database now? In any case load has shot up into the 11s (12 max) with 11 threads at 97% and 1 thread jumping between 75-80% and back down to 5% … I assume this one must be doing the I/O and is has a lot of free time on its hand while its waiting for the “write” to finish.
- Supposedly it’s the creation of the indexes that takes the longest time … so I’m still expecting this to finish until sometime tomorrow or middle of the night tomorrow night.
- 1/1 6:00PM Uggggh – I forgot to turn off fsync and full_page_writes … uggggggh … had to kill the import, drop the database, update the settings and restart the import. Ugh. Did I say ugh yet?
- 1/2 5:30AM After restart, it took (7h 54m 3s) to run again. Interesting, I wonder if the 2 minutes slower is because I had written to 23% of the entire SSD by the time I stopped the import. In order to do the import again, you have to drop the database, which took it back down to only 4% used … but I’m wondering how well all that space was freed and whether the SSD is more fragmented? It only had 1% usage before I started the import. So I have no idea what the other 3% used would be since I haven’t manually copied anything onto the drive after starting the import.
- Been stuck on “precomputing” word tokens for almost 1.5 hours … this looks to be single threaded as only one core is being used at 100% at a given time … Disk space is very slowly going down, so I know it is actually doing something. Occasionally it switches which cores the postgres task is running on … and I learned that the reason Ubuntu does this is as the processor approaches thermal limit, Ubuntu will switch the process to another core to let the first one cool off. I can verify that experimentally with the command:
sensors | less
Which shows me that the core with the highest temp is the core shown as 100% in htop. Also, I figured out how to show the current CPU frequency of each core using this long command:cat /proc/cpuinfo | grep -A 4 MHz | grep -v cache | grep -v physical | grep -v siblings | grep -v \\-\\- | grep -v 2600This works by showing 4 lines after MHz and then grepping out the three lines between the cpu frequency and the core id and the “–” that grep puts between each hit when you are showing multiple lines. In the result, the frequency is shown immediately above the core id, and the cores that are all operating at their base frequency (2600) don’t show anything - Update, at exactly 1.5 hours, it finished Precomputing word tokens and started calculating postcodes 04:32:32 and 06:02:32 … and the result displayed showed two separate counts 34,986,446 (1 row) and 1,336,433 (1 row). I assume this is the result of executing the psql query, but you can’t see the query or get any meaningful info out of the display. I’m guessing this must be a count of two different “kinds” of word tokens?
- 1/2 – 5pm It made it to the infamous “rank 26” index process … was flying along at 1200+ (rows?) per second, but it has now ever so slowly started to decrease in rate … it has now made it down to 1142 (rows?) per second and the ETA continues to increase instead of decrease (after a couple hours). It makes it feel like it will NEVER finish … you know what they say “a watched planet-wide import never finishes”!
- 1/2 – 7pm Ok, finally, it has started going back down again … the rate has bottomed out at 1112 (rows?) per second and is slowly climbing, which means the ETA is going down again!
- 1/3 – 6am Next morning: it snowed overnight! (barely) … plus Rank 26 just finished as I am debugging my solution to Day 22 of advent of code. Total time was 70,869 seconds although I’m pretty sure you need to divide that by about 12 as that is likely CPU time and it was using 12 threads pretty fully. Also, htop showed a 5 minute load average of more than 13?!?! I figured 12 was the highest it could go. Load is simply a count of how many processes are using a CPU. With 6 cores hyperthreaded making 12 logical cores, the operating system can schedule 12 processes to run at one time. It’s really rare to need that many … any above that many are going to go into a ready queue while they wait their turn to run. So this means one of two things: 1) Nominatim (or postgres … b/c the processes using the core were all postgres processes) can determine how many logical processors I am using (I didn’t specify it anywhere) and schedules that many processes. 2) The CPUs are fast enough that if more than that are scheduled, it can handle all of them such that they are waiting for I/O and removed from the running/ready queue while waiting for I/O. This means there could be 20+ postgres/nominatim processes all launched, but at any given time the “extra” processes are going to be waiting to finish I/O and the other processes can be serviced quick enough that it is mostly rotating fast enough through the processes leading to a max of just under 12 average … and then at some point it spiked up above 13 for some reason. I don’t know … I’m thinking option 1 is more likely, BUT there are 16 nominatim “postgres” processes and a few extra postgres processes … so who knows?! https://www.howtogeek.com/194642/understanding-the-load-average-on-linux-and-other-unix-like-systems/
- The system is soooo quiet while starting rank 27. Also, the autovacuum worker is taking up small portion of the CPU and the others are idle … uh-oh just got loud again, let’s see what is happening: must have been prepping for rank 27, b/c now rank 27 is really going with ETA of 39000 seconds that is dropping by about 200 seconds per second so really is probably only going to take about 10-15 minutes instead of 13 hours. I’m not sure how they are calculating ETA … I wonder if it is a carry over from single core single thread days. It’s only been about a minute since I started typing this and it’s already done 5 hours of work according to the ETA. I wonder if that is based on the known amount of time that a really slow system would take. And it only gradually updates based on real-time activity?
- 1/5 – 3pm LOL, rank 30 just started, initial ETA of 2,000,000 seconds (~23 days), but that ETA is dropping at a rate of about 1000 seconds per second. I’m sure it will slow down, but we are down to 200,000 seconds (~2.3 days) already after less than a minute. Load is pushing 12 with all 12 threads active. Definitely slowing down now (a little sooner than I would like), so I’m going to say this is at least 12 hours of processing left. Acceleration has already slowed to 200 seconds per second. Scratch that down to 100 seconds per second … I think the ETA will stabilize in the next minute or two and then likely will go up at some point and down at other points. Under 2 days to go at this point, but the rate at which it is no longer accelerating makes me think it could be as much as a day. After another minute or so, it is down to about 50 seconds per second.
- Uh-oh, as anticipated the ETA for rank 30 started going back up (instead of down), but at 117,000 seconds to go! Whew, it just started going down again (and now back up again, uh-oh). I just gotta wonder how on earth are they calculating the ETA…
- So close on Advent day of Code 19 (the last day I need to finish). Looking over at the import … 150 seconds to go on Rank 30! Woohooo! 84,420 seconds (don’t think that is real-time b/c it was yesterday afternoon when I started and it’s still morning now)
- Well, after it finished rank 30 (it simply said “Post process tables” … that finally finished 2.5 hours later with no update that it was doing anything at all. I could see 100% of a single CPU being used for a while, and then I mistakenly triggered some tile rendering (big mistake) which shot the RAM usage up to nearly full … so I stopped the renderd service mid tile rendering. It should be able to recover from that no problem … but it was interesting to see … it makes me think that I need to keep a LOT of swap space partitioned in case there is an unexpected hit on both the tile server and the nominatim geocoding server at the same time. Since tile rendering isn’t as crucial, maybe there is a way I can limit the max RAM allocated to renderd.
- It has moved on to “recompute word counts”. I remember the first “precomputing word tokens” taking about 1.5 hours … I wonder if this is somehow related and whether it will take a long time as well. Nope. Just finished (25 minutes).
- Started: 2022-01-01 18:06:36
Finished: 2022-01-04 14:12:08
Grand total: 2 days, 18 hours - Omg, I should have downloaded updated planet.osm … the update … 29 days of updates is about 60% done and taken almost 12 hours already. Grand total for the update will be approx 20 hours. It would have only taken 3-4 hours to download the new planet.osm! Ughhh.
- Whew! Finally finished at 10:30AM the next day … so roughly 18 hours of updates for 29 days worth of osm updates. It’s still not entirely clear to me whether you need to use crontab to schedule an update every so often. This is for sure the best way to make sure the database stays up-to-date. But not sure what the “–init” option does in nominatim replication –init
- Went with the “continuous” update option detailed on the nominatim.org 4.0 install page.
- Also, I finally found the small section fo the page that describes how to install nominatim-ui (not sure why they dropped it from nominatim itslef)
- Exciting news, but the number of lanes and speed limits is in the “extratags” data for nominatim … the challenge, though, is that it’s not on all roads, just some of the roads. Also “population” data is available for larger places (I noticed it for shelby county)
- 1/9 – 6am – Installed OS ubuntu updates and rebooted for first time … let’s see if everyting works:
- lol, both tileserver and nominatim weren’t working correctly
- tileserver couldn’t create socket in /run/renderd … changed ownership to osm.osm, rebooted and system locked up during login. Not sure if renderd kicked up or what? Had to do unsafe shutdown … strange noises too. Not good. Logged in slowly next time. But no lock up.
- Bug in /etc/fstab … perhaps this was what caused lock-up … not able to mount /srv/nominatim … you can’t use uid=1001,gid=1001 on ext4 filesytem, that is only for non-unix filesystems
- Still problem with osm tile server after reboot … fixed by man tmpfiles.d and adding a copy of the screen conf file already there and and calling the file renderd.conf – forcing it to create the /run/renderd folder with correct user permission:
d /run/renderd 077 osm osm - Nominatim replication wasn’t starting correctly b/c it has to start AFTER the postgresql service. Here is my final /etc/systemd/system/nominatim-update.service file:
[Unit]Description=Continuous updates of Nominatim
After=postgresql.service
[Service]
WorkingDirectory=/srv/nominatim/nominatim-planet
ExecStart=nominatim replication
StandardOutput=append:/var/log/nominatim-updates.log
StandardError=append:/var/log/nominatim-updates.error.log
User=postgres
Group=postgres
Type=simpleRestart=always
RestartSec=3
[Install]
WantedBy=multi-user.target
- Sat Jan 15 8:20am – Note the addition in bold above, one of my updates overnight failed the night before last (presumably b/c of error in the OSM source data given the error message indicating that something was wrong with the data (i.e., there was a number too large to fit in smallint … maybe somebody specified a huge number for a field that is supposed to be small) and this killed the replication script … which means even after OSM fixed their problem, my script was no longer updating … and I was not aware of this, so I had nearly two days worth of updates to install (which are almost done, now). In any case, the above changes to the script should solve the problem. One potential issue is that it might just repeatedly fail assuming that it takes a while for OSM to fix the problem.
Also, note that I’m using timestamps now for these notes, which I should have done all along! I’ve thought about doing this numerous times, but was so far along I thought it wasn’t worth it since I wouldn’t have the early timestamps … well, it’s better late than never, adding timestamps now.
Key Results
- OSM full planet tile server and nominatim (geocoding) installs … plus (hopefully) automatic planet updates weekly
- 1/14 – 9am Complete port of all my websites from my linode: (but what about DNS updates … every hour a script looks to see if my AT&T ip address has been updated for any reason and automatically updates the A record on godaddy via a script for ALL websites.)
- https://toonesalive.com (the original website circa 2003)
- https://mybiketraffic.com
- https://di2stats.com
- https://briantoone.com (and subdomains)
- https://cs.briantoone.com
- https://toone2015.briantoone.com
- https://toone2017.briantoone.com
- https://cycling.briantoone.com (coming soon – port of https://toonecycling.com)
- https://topocreator.com
- https://pickuta.com
- https://eddingtonmap.com
- https://spainparkmtb.org
- https://howmuchtogo.com
- https://goxp.org
- https://gopvp.org